Box, Dropbox, Google Drive, and Microsoft OneDrive all have their place, but as of March 2020, Apple users no longer have to venture outside the Apple ecosystem for online folder sharing. Before then, you could share a single file in iCloud with another iCloud user, but nothing more. With iCloud Drive Folder Sharing, you can share an entire folder, complete with permissions that control what your collaborators can do with the contents of the folder.
Pros and Cons
Why use iCloud Drive Folder Sharing instead of the more established services? Cost is the main one. Say you’re already paying Apple $9.99 for 2 TB of storage so you can use iCloud Photos with a large library. Why pay one of the other services another $9.99 per month—$240 per year—when you can get the same capabilities using iCloud? (Dropbox used to be entirely usable at its free level for those who didn’t need much shared storage, but users at that tier are also limited to just three devices, rendering it problematic for anyone with an iPhone, iPad, and desktop and laptop Macs.)
The main reason not to use iCloud Drive Folder Sharing is if the people with whom you want to share documents aren’t Apple users. Such people can get a free iCloud account if they create an Apple ID and then access iCloud Drive in a Web browser. Windows users can instead install iCloud for Windows to access it in Windows Explorer. But that may be too much effort for many.
iCloud Drive Folder Sharing on the Mac
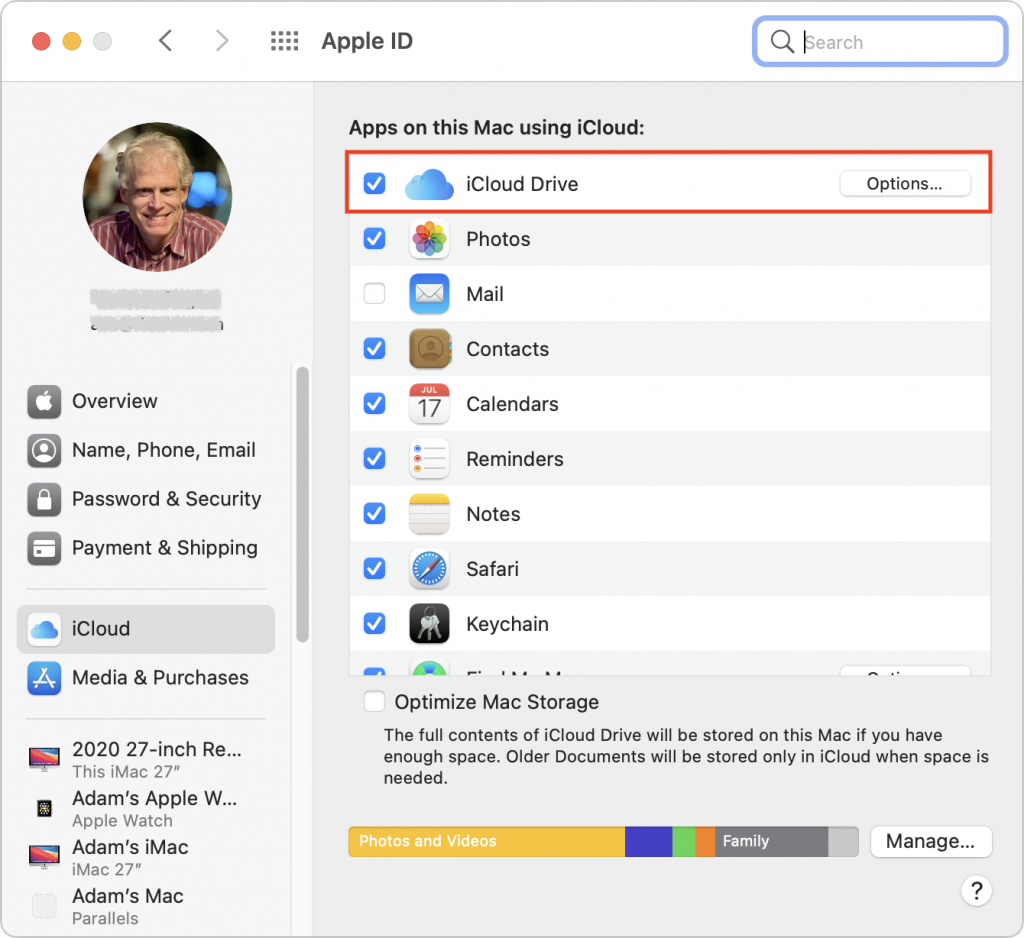
First off, make sure iCloud Drive is selected in System Preferences > Apple ID > iCloud. If you have plenty of storage, leave Optimize Mac Storage unchecked. It’s worthwhile only if your Mac’s internal drive is nearly full.
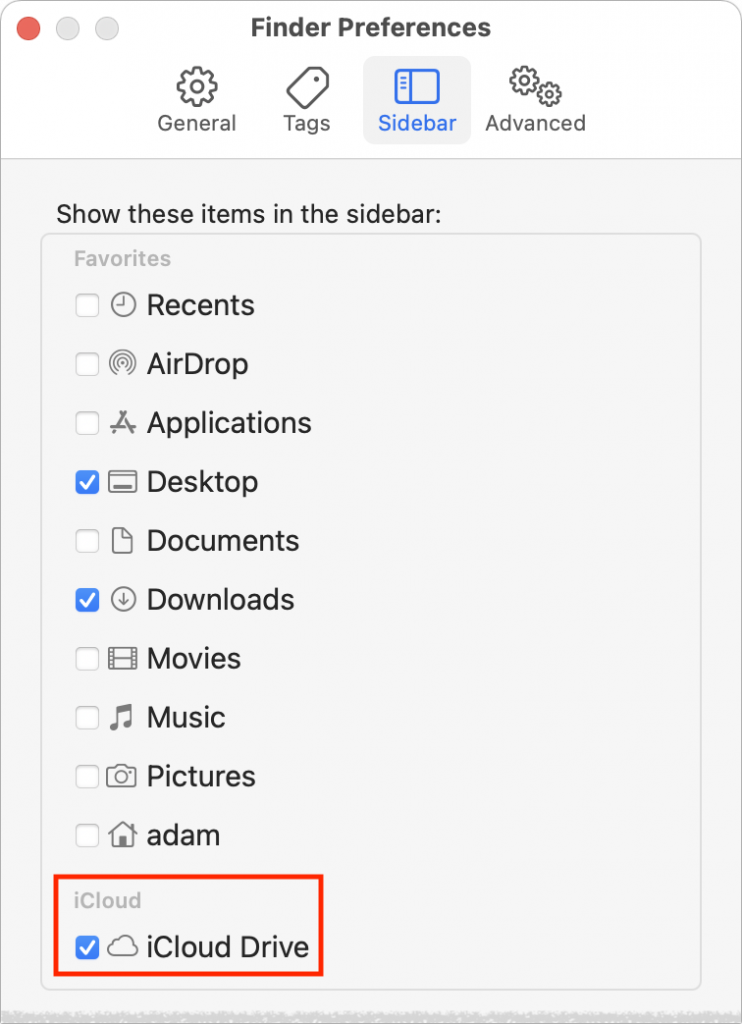 On the Mac, iCloud Drive creates a special folder to hold all the data mirrored to iCloud. You can access it by choosing Go > iCloud Drive in the Finder. It’s usually available in the sidebar of Finder windows too. If not, open Finder > Preferences > Sidebar and select iCloud Drive.
You’ll likely see quite a few folders in iCloud Drive already, with names and icons matching apps that synchronize their data and files via iCloud. These folders exist purely for you and your apps—you can’t share them. However, you can create and share other folders within iCloud Drive.
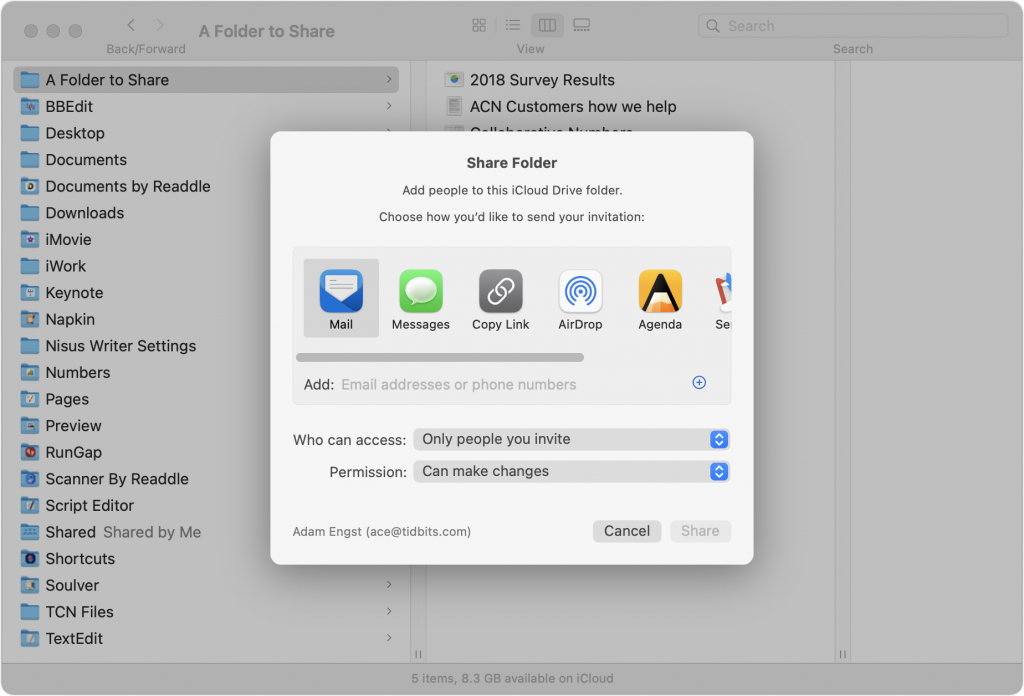
To share a folder you’ve created, Control- or right-click it and choose Share > Share Folder to display a Share Folder dialog. You need to do three things here:
- From the Who Can Access pop-up menu, choose between “Only people you invite” and “Anyone with the link.” With the latter, you’re opting for security only through obscurity, so avoid that option if the data in the folder is confidential or important.
- From the Permission pop-up menu, choose between “Can make changes” and “View only.” Think carefully about this choice—view-only users can still copy files out of the folder and change them locally on their computers. However, they won’t be able to change your versions of shared files or add new files to the folder.
- Despite its position at the top of the dialog, choose the manner of sending the invitation last. If you’re sharing only with people you invite, you can select a sharing method and enter their email addresses or phone numbers. For folders shared with anyone who has the link, you don’t need to enter information for specific users.
When the people with whom you’re sharing the folder receive the sharing invitation or link and open it, the shared folder is added to their iCloud Drive folder. Its icon will have silhouettes of multiple people to indicate it’s a shared folder.
What if you need to invite more people, change permissions, get the sharing link again, or stop sharing entirely? Control- or right-click and choose Share > Manage Shared Folder (there’s also a Copy Link option there). A new dialog appears.
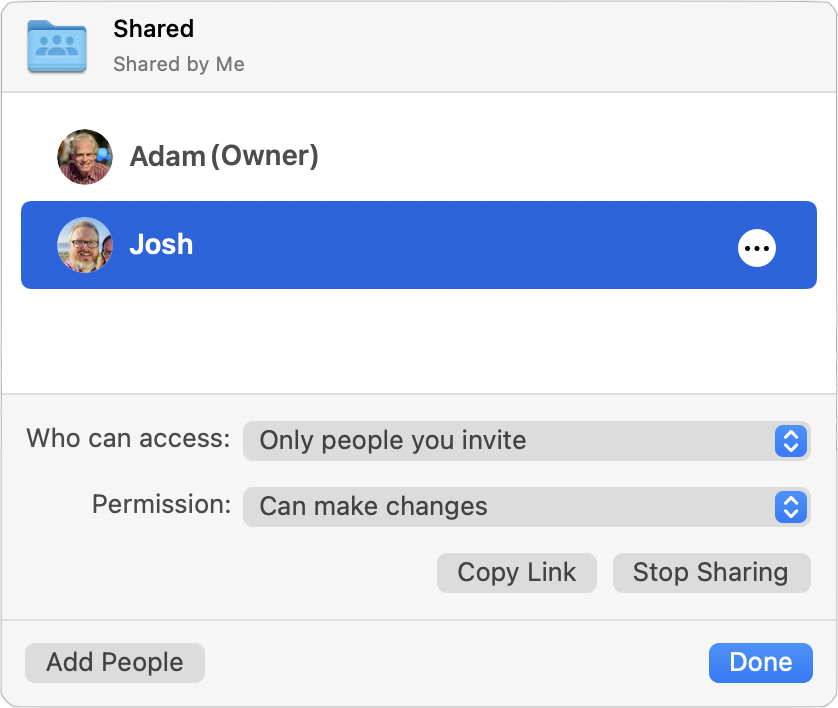
Most of the controls here are self-explanatory, but note that you can revoke a person’s access and change their permission level by clicking the ••• button in the row next to their name.
iCloud Drive Folder Sharing in iOS/iPadOS
The process is similar in iOS and iPadOS. Follow these instructions in the Files app:
- Press and hold on the folder you want to share.
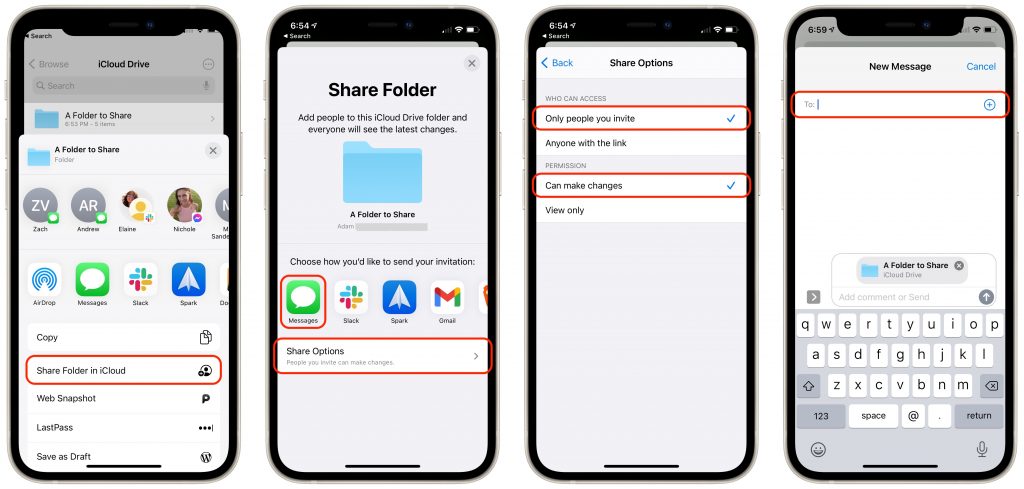
- In the sheet that appears, tap Share.
- In the Share sheet that appears, tap Share Folder in iCloud.
- On the Share Folder screen, first tap Share Options and set Who Can Access and Permission.
- Tap Back to return to the Share Folder screen, and tap the app through which you want to send your invitation (Messages below).
- Enter the name of your recipient or pick them from your contacts list.
- Enter a message to your recipient and send them the link to the shared folder.
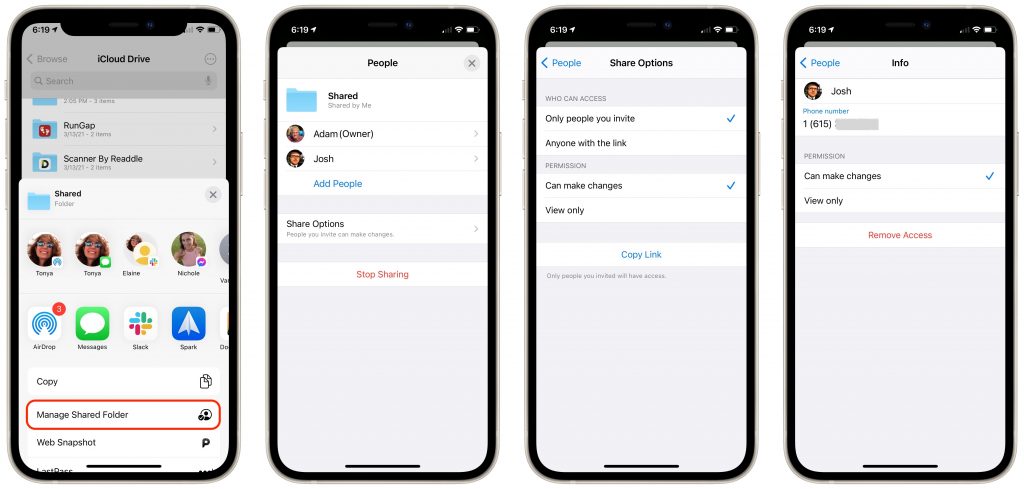
Managing a shared folder in the Files app is similar. Once you press and hold on an already shared folder and tap Manage Shared Folder in the Share sheet, you can do the following:
- Tap Share Options to change Who Can Access and Permissions options, or to copy the link to the shared folder.
- Tap a person’s name to change their permissions or remove access entirely.
- Tap Stop Sharing to stop sharing the folder.
One final tip. Although iCloud Drive generally works well, we’ve occasionally seen it get stuck syncing on the Mac. You may see files or folders fail to sync between devices or have a file or folder permanently display the little cloud icon in the Finder that indicates iCloud Drive is updating. To resolve such problems and reset the local state of iCloud Drive, first make a copy of any critical files to the desktop, just in case. Then open System Preferences > Apple ID > iCloud, deselect iCloud Drive, click Remove from Mac when prompted, and then select iCloud Drive again. Give it some time to resync with iCloud and download new copies of your files.
(Featured image by sendi gibran on Unsplash)