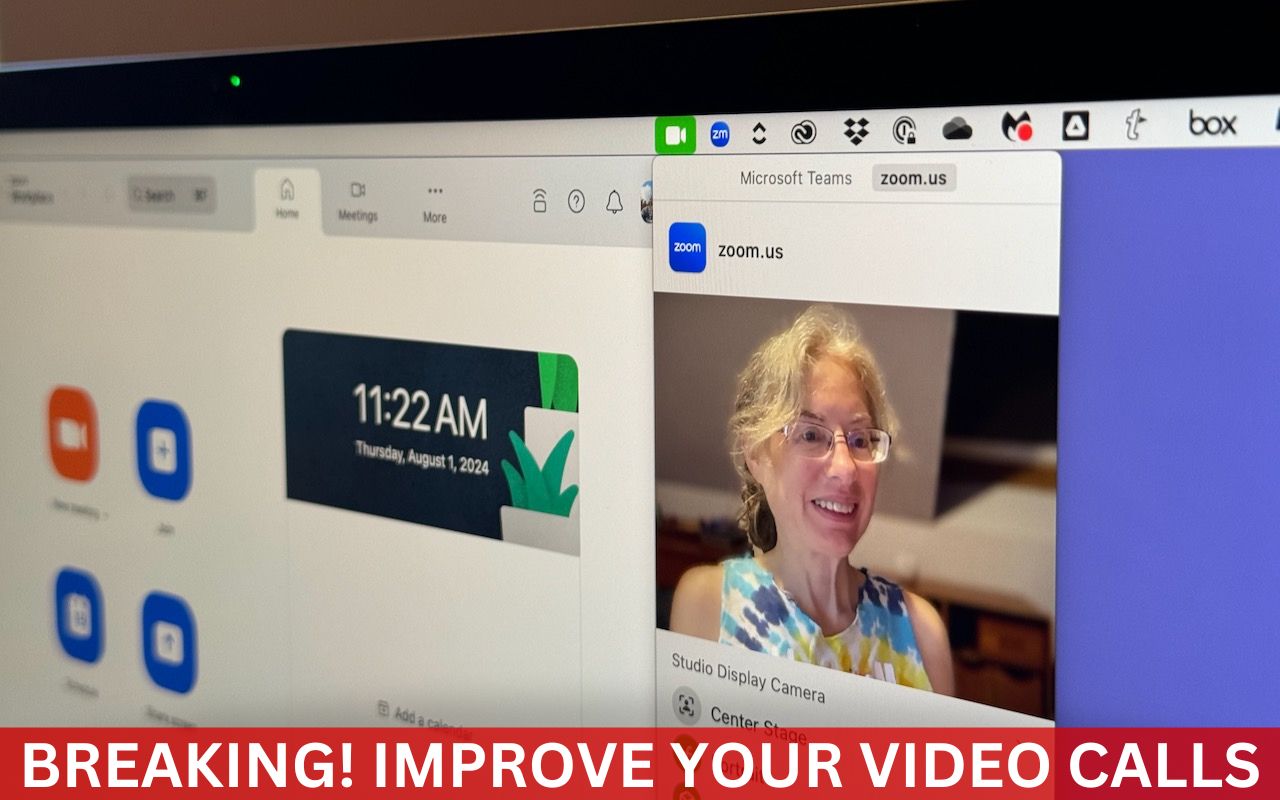
A side effect of the pandemic is that online videoconferencing improved drastically. Video calls happened before 2020, but videoconferencing wasn’t an everyday activity for most people. Now, with many people working remotely or in a hybrid model, it’s a fact of business life. To support videoconferencing tools, Apple has extended macOS’s basic webcam and microphone capabilities to allow Mac-powered video calls to go beyond the basics. Apple’s enhancements fall into four categories: camera modes and controls, mic modes, reactions, and Presenter Overlay.
Camera Modes and Controls
Apple’s most important additions rely on machine learning to enhance your image or the background. Because of the significant camera and CPU requirements for these features, they require specific setups. All work with any Mac using a sufficiently recent iPhone (excluding the iPhone SE) with Continuity Camera, but several also work with a Mac’s camera.
Here’s what you can do in macOS 14 Sonoma (these features are also available in macOS 13 Ventura’s Control Center, under Video Effects). To access the controls for these features, click the Video ![]() menu in the menu bar—it appears whenever the camera is active, but not before. Click each feature to turn it on (green) or off (gray), and each has additional settings you can reveal by clicking the > to the right.
menu in the menu bar—it appears whenever the camera is active, but not before. Click each feature to turn it on (green) or off (gray), and each has additional settings you can reveal by clicking the > to the right.
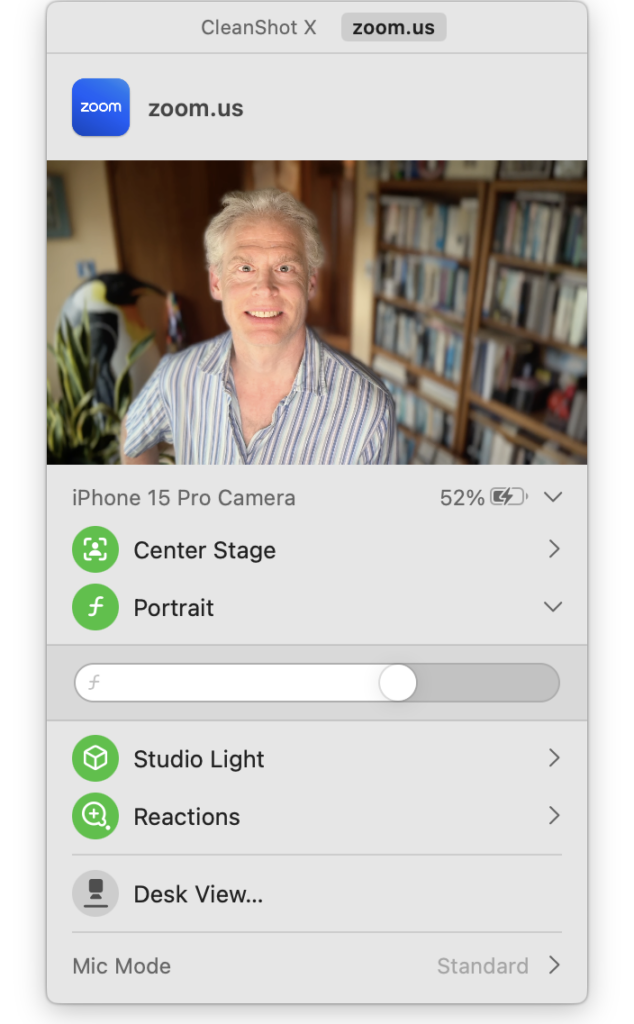
- Center Stage: Use Center Stage to stay centered in the frame as you move around during the call—it’s great for those who work at standing desks and dislike standing still, but be careful if you leave room clutter near the edge of your camera’s view, because it may be revealed as you move. You can choose between the iPhone’s Main and Ultra Wide cameras; experiment to see which you prefer. It requires an iPhone 11 or later over Continuity Camera or a Mac with Apple silicon using an Apple Studio Display.
- Portrait: Rather than replace the background like many apps allow, Portrait blurs the background to keep the focus on you. Its slider lets you control the blur level. It works with an iPhone XR or later via Continuity Camera and on Macs with Apple silicon using a built-in webcam or Apple Studio Display. (Zoom and other apps add a Background item to the Video menu as well; Portrait blurs virtual backgrounds, too.)
- Studio Light: If your room has poor lighting, Studio Light can improve your appearance by dimming the background and illuminating your face. Move the slider to adjust the lighting to your liking. Its Continuity Camera requirements specify an iPhone 12 or later, or a Mac with Apple silicon using its built-in webcam or an Apple Studio Display.
- Desk View: This mode leverages the Ultra Wide camera of the iPhone 12 or later via Continuity Camera to display both your desk and your face simultaneously, which could help show off physical sketches or other objects. It launches a separate Desk View app and requires additional setup beyond what we can document here. Set aside some time to become familiar with it before attempting to use it in a call.
- Manual controls: If you’re not using Center Stage, you can zoom, pan, and recenter your face in the frame. Move your pointer over the video preview, after which you can drag the zoom control left or right, drag your image within the frame to pan, and click Recenter to reset any zooming and panning changes you’ve made. These controls require an iPhone XR or later via Continuity Camera, or any Mac connected to an Apple Studio Display.
Mic Modes
Apple also uses machine learning to enhance your audio, providing spatial audio and two special modes: voice isolation and wide spectrum. To switch between these modes, click Mic Mode in the Video ![]() menu or the Audio
menu or the Audio ![]() menu in the menu bar—the latter appears if a running app only does audio and the microphone is active. (Again, these are available for Ventura users under Mic Mode in Control Center.) Here’s what they offer:
menu in the menu bar—the latter appears if a running app only does audio and the microphone is active. (Again, these are available for Ventura users under Mic Mode in Control Center.) Here’s what they offer:
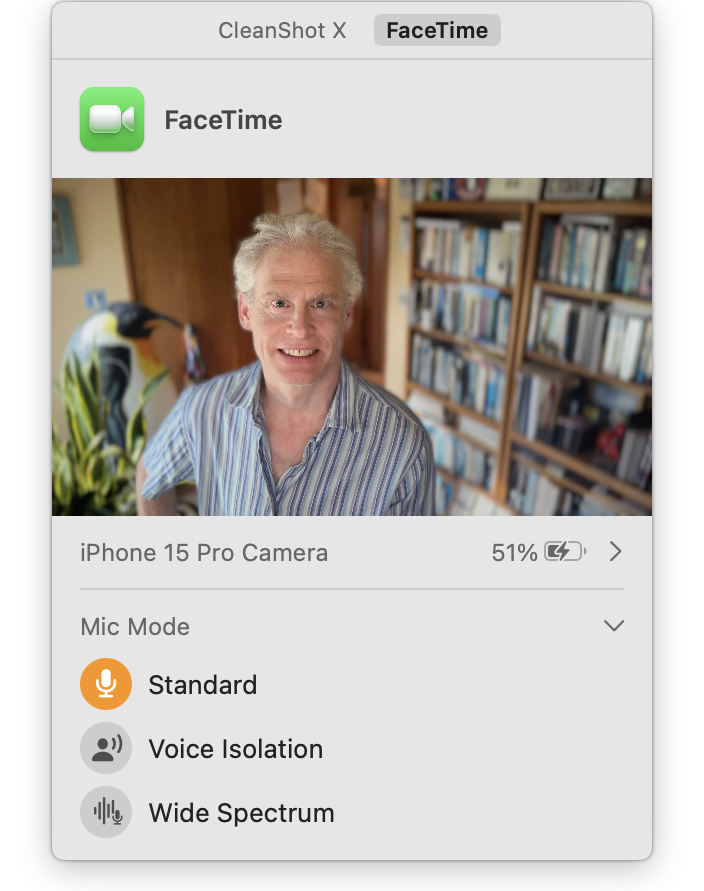
- Voice isolation: Use this option to focus on your voice and reduce background sounds in your environment. It’s a good choice for standard video calls.
- Wide spectrum: This option captures your voice and the sounds in the environment around you. Choose it if you want the other parties to hear music being played or other ambient sounds.
- Spatial audio: For multi-person calls, spatial audio makes the voices you hear sound like they’re coming from where each person is positioned on the screen. It doesn’t appear alongside the others; we assume it’s included in Standard mode. It requires wired headphones, a Mac laptop using its internal speakers, or an Apple silicon Mac using AirPods.
Reactions
While Apple’s camera and mic modes are generally useful, many people have issues with the Reactions feature, which fills your frame with a 3D effect when you make the associated hand gesture. The problem is that you can inadvertently make such a gesture when it would be highly inappropriate. Imagine filling the screen with balloons while you’re on an important call with a client’s CEO or, if you’re a therapist, accidentally shooting off fireworks while talking through sensitive issues with a patient. Reactions include hearts, balloons, thumbs up, thumbs down, rain, confetti, fireworks, and lasers.
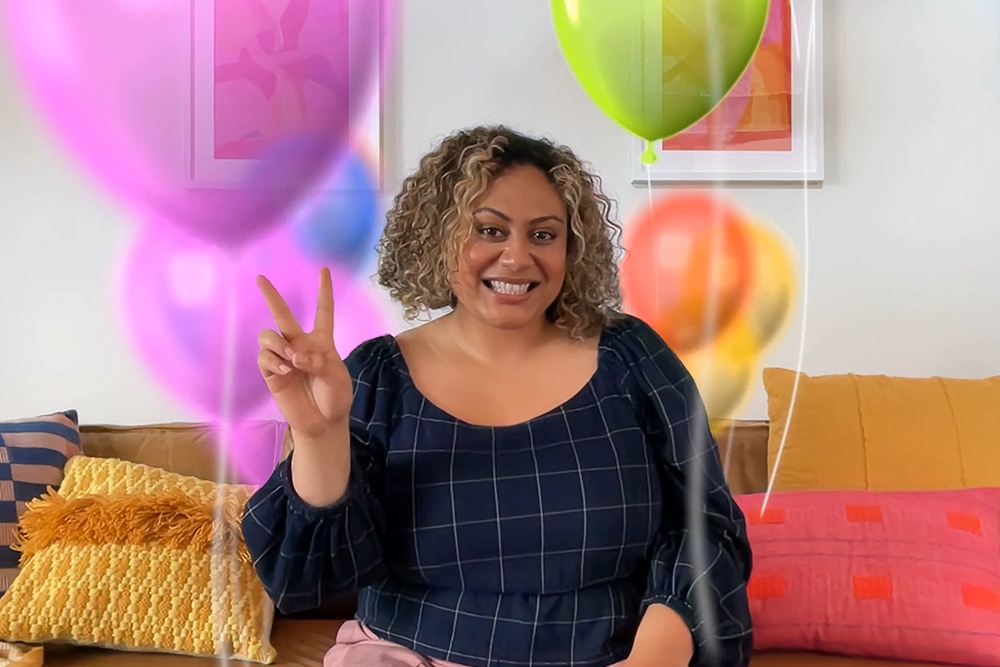
You can turn off the Reactions feature entirely in the Video menu, and we recommend doing so unless all your video calls are informal and light-hearted. When it’s off, you can manually trigger a reaction by clicking its icon in the Video menu.
As with other video-related features, the Reactions feature requires a Mac with Apple silicon or a Mac using Continuity Camera with an iPhone 12 or later.
Presenter Overlay
One problem with sharing your screen while videoconferencing is that the audience no longer sees you. That’s appropriate when everyone should focus on the shared screen, but in other situations, the audience may tune out if they can’t see you. Apple designed Presenter Overlay to combat that problem—it merges your image with the screen you’re sharing. The Large option puts your shared screen behind you, like a news presenter, whereas the Small option shows your face in a movable bubble, so you stay on screen without obscuring much content.
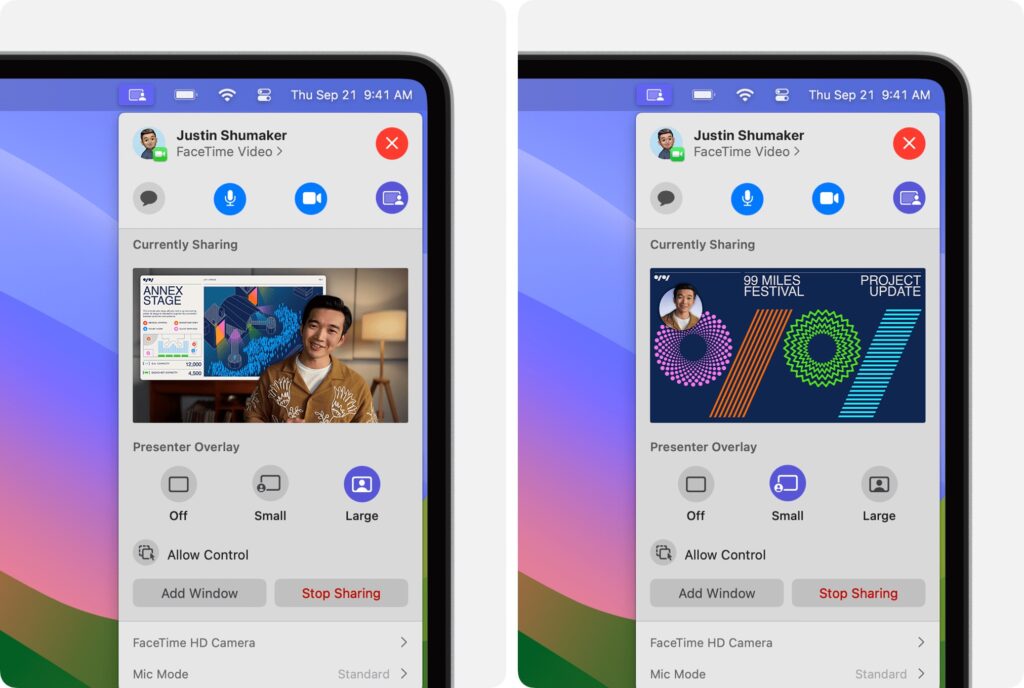
To start using Presenter Overlay, start sharing your screen using the screen-sharing feature of the videoconferencing app you’re using. Then click the Screen Sharing ![]() menu in the menu bar, expand the Presenter Overlay section if necessary, and select Large or Small. The video preview shows what your audience sees. (Presenter Overlay has been somewhat flaky in our testing for reasons we don’t understand. If the controls don’t show up, try switching cameras or restarting screen sharing.)
menu in the menu bar, expand the Presenter Overlay section if necessary, and select Large or Small. The video preview shows what your audience sees. (Presenter Overlay has been somewhat flaky in our testing for reasons we don’t understand. If the controls don’t show up, try switching cameras or restarting screen sharing.)
In Large mode, you can move the shared screen to your other side by moving your pointer over the video preview and clicking the button with opposing arrows. In Small mode, you can move your bubble (it’s on your main screen, not the preview window) by dragging it to the desired position.
If you fell into specific videoconferencing habits in the early days of the pandemic, take a few minutes to explore the options that Apple now makes available for improving your video, audio, and presentations. And turn off the Reactions feature if you don’t want to be surprised by an accidental gesture triggering an effect at a potentially awkward time.
(Featured image by Adam Engst)

